Thursday, August 28, 2014

Confessions of a Pot Grower


 Weed, Bud, MJ, Ganja, Smoke.  Love it or hate it, legal marijuana is making its mark in the U.S.  As laws pertaining to the legal used of marijuana are being passed around the country, the old barriers and paradigms about this plant and its uses are breaking down and being re-invented.  Most of the advocacy behind this movement is focused on the medicinal attributes of this plant, and the wide variety of conditions it is reported to effectively treat.  As a result, I think one of the hottest new trends in gardening may well be the growing interest in Cannabis cultivation for personal medicinal use.  To-date, 23 states in the U.S. have passed laws legalizing the medical marijuana.  These laws vary widely from state to state, but many of them include the right to grow your own, some allowing up to 12 plants in cultivation!

On a recent visit to my home state of Maine, I had the opportunity to interview a certified "Care Giver," a designation which allows her to have in cultivation up to 6 mature marijuana plants per patient, with a maximum of 5 patients. In addition she is allowed to have a substantial amount of immature plant material in other various stages of growth - up to 12 immature female plants per patient, and an unlimited amount of seeds, seedlings, cuttings, stalks and roots.  As you might imagine,cultivation of this much plant material takes a not-insignificant amount of time, effort, and knowledge.

The following interview is with the Care Giver in Maine, who is happy to share her thoughts, but not so eager to share her identity.  Please know that this interview represents one person's views in regards to the legal cultivation of marijuana in one state, Maine.  This information is not intended to guide or instruct anyone, but is written purely as an informational document.  

How does the law work in Maine?


Maine passed a medical marijuana law in 1999, and has had activists all along the way lobbying to make sure Maine is serving the population that needs this, both the patient and the grower.  While it has an established 8 state dispensaries, Maine has  also allowed for private growers called Care Givers that deal directly with patients. A patient is someone with a treatable  condition and has received a prescription from a doctor specifically licensed to write certify patients for use of medical marijuana.  This certification needs to be renewed annually.  They are issued a watermarked certification printed on watermarked paper, so it is not easily counterfeited.  Once they have that certification, they can purchase from the dispensary, grow their own, or search for a care provider.  Some doctors provide business cards of growers at their offices, but they do not recommend specific growers.

Certification can be obtained for a wide number of conditions.  Specifically, the law states that a patient may receive a certification for any "debilitating medical condition." In addition to the named medical conditions one might be familiar with (Cancer, Glaucoma, HIV, etc.), this can include conditions that cause "intractable pain," muscle spasms, seizures, and nausea.  There is currently a push to have OCD added to the list of treatable conditions.

How did you get started growing?

Years ago I owned a greenhouse/nursery business, and had an employee who suffered from chronic back pain.  She was taking approved pharmaceuticals for years, but didn't like the side effects.  After medical marijuana was approved, she purchased it from a state dispensary, but was dissatisfied with the quality of the products she was able to obtain there.  A few years ago, she began to encourage me to consider becoming a Care Giver.  She knew I could produce a high quality product, and she kept after me to consider it.  I finally applied for and received a growers license in 2013, but, by then, I guess she had found another supplier, because I haven't heard from her since.

How do you determine how many plants to grow?  

Well, as a Care Giver, I may have up to 5 patients.  I pay the state $300 per patient, which allows me to have up to 6 plants mature plants in cultivation per patient at any given time. Mature plants mean plants that are coming in to bud.  I can also have a large number of immature plants per patient.  That gives allowance for loss. For example growers need remove any male plants without impacting the supply they require for each patient. It is impossible to tell male from female plants until they reach maturity, so you  must cultivate the plant at least until that stage to identify the plants that must be removed.

Some people cultivate indoors, and can grow year round.  That is more complicated and more expensive, so I choose to only cultivate outdoors, and can only do one crop per year.  

Currently, I have 3 patients.  I had 2 other patients, but one recently passed away from cancer, and the other has started growing their own.  I'd like to find 2 more patients, but need to be discreet because I don't necessarily want everyone in town to know what's growing in my back yard.

Tell me about the growing process?

Well, marijuana plants are dioecious, which means there are male and female plants.  Growers are only interested in the female plants, as it is their buds that are what is harvested.  These days, most plants are cultivated from cuttings, although you can purchase feminized seed.  I purchased some of my starts at a conference I was at this winter.

If you grow from seed, it is important to pay attention as the plants mature and weed out the males before they can pollinate the females.  Last year, I failed to do this, and ended up with a plant that not only was pollinated, but also dropped seeds.  This year, I have some volunteer plants in my garden that came from that, so I need to pay attention in the coming weeks to make sure I remove any males.  The rest of my plants are all females, and should start going into bud in the coming weeks.

Tell me about the harvesting process?

Growing the plants is relatively easy.  Marijuana plants are vigorous growers, and given proper amounts of nutrients and water, grow relatively pest-free.  Harvesting, thought, is the trickiest and most important part of the whole process.  There is a point in the budding process where the female is producing the maximum amount of hormones.  Identifying the perfect time for harvest is an art form that maximizes the effectiveness of your product.  I use a jeweler's loupe with 60x to check the buds during this stage of growth.  I am monitoring the trichomes-the tiny hairs that project from the female bud.  The trichomes begin to exude a sticky resinous substance. As the bud matures, this substance changes in appearance from clear to milky white, to, finally, amber.  Exactly when the bud is harvested during this process greatly impacts the affect the bud will have when used--from a "head high" to a "body stone," so knowing your patient and their needs plays a role in this.  I harvest in the "milky white" phase  When they are ready, I harvest only the buds--only the top 6" of the stems.  

Once the bud has been harvested, it needs to be hung to cure in a dry, shady spot.  Then comes the most tiresome work of all--trimming the bud.  Literally, all the extra plant material needs to be trimmed away, leaving just the bud.  This is very detailed work, and I can only do so much at a time before my hand hurts from holding the scissors.  But a clean bud makes for a high quality product, so I spend the time to do it right.

Tell me about the strains you are growing?

As I already mentioned, timing of harvest impacts the affect obtained when used.  That said, it is important to know that different strains have been selected over time for their ability to treat different conditions.  Some are great for pain relief, and relax the body. Others have more of a head effect, affecting your mental acuity. So I have selected a variety of plants that are specific to needs of the patients I have.  I have about 8 strains this year, including M.O.B. (Mother of Berry, a privately cultivated indica strain not widely available), Train Wreck, G13, AK-47, Blue Hell, Hash plant, and Sour Deisel, as well as some Isleboro crosses.   In the past couple of years, I have grown from purchased seeds and/or cuttings, but in the coming year, I plans to try to winter over some of my own "Train Wreck" cuttings as starts for next spring.

Marijuana has long been an illegal substance in our country the growing and/or use of which was punishable by law.   Why do you think that is changing now? Do you think there is a gap between public acceptance and legal acceptance.  What do you think the future holds for marijuana use in our country?

In part I think this was an inevitable cultural shift. Marijuana had been perfectly legal until a series of laws began to penalize its use in the 1930s..  But facts win out in the end.  I  believe, like many people, that Marijuana is neither addictive nor physically damaging in the way that alcohol abuse can be. As the older generation ages out, younger folks who didn’t grow up with that “Reefer Madness”  image experimented and found it to be not only a pleasant, mellow high but also instrumental in pain relief, seizure disorders, autoimmune conditions and a long list of other chronic complaints. I suspect that veterans returning from the Vietnam War accelerated this trend.


 It appears to me that the country is ready to accept medical marijuana and possibly to decriminalize recreational marijuana as well... in the same pattern as the civil rights movement, women’s rights and gay marriage. Change is inevitable. I expect to see resistance from the alcohol industry, the pharmaceutical industry, even the prison industry since so many are now privately owned and full of people whose only mistake was to have in their possession a “usable” amount of marijuana. Ironically, I’m not a consumer myself — I never cared for the buzz and I have no medical condition to treat. But since there are cannabinoid receptors in every cell of the human body, it would appear that God and nature conspired to give us a plant that would both delight and heal. What’s not to like about that?


Monday, July 28, 2014

More on 930 Rosemary Lane Lake Forest, IL (Pirie Garden)


Yesterday I wrote about my visit to the beautiful gardens at 930 Rosemary, Lake Forest.  These gardens date back almost 100 years, when they were first designed by Rose Standish Nichols.  Today, they have been lovingly restored by the current owners of the property, and through their generosity and the Garden Conservancy Open Days program, opened to the public for a special viewing day.  

I was so taken with my visit that I spent some time researching these gardens (some of the details can be found in my entry from yesterday).  In the process, I came across a couple of archival photos of the garden known as "The White Garden."  It is fascinating to look at the evolution of this garden.

The first photo, below, is dated in the Smithsonian Institute archives as 1914.  While most written records seem to date Rose Standish Nichols work on this garden to 1920, it is not inconceivable that she accomplished some of that work earlier, as the house was built in 1904, and it does seem a little odd that the owners would wait some 16 years before landscaping their property.  In this photo, you can see the two reflecting pools, along with the Chinese statue at the far end of the garden.  Those elements remain exactly the same today, but the overall impact has changed dramatically.  Note the walls of evergreens.  If you look at the shadows, you see the suggestion that there is space to pass in between each of them, creating many "doors" to the garden.  The garden is a simple and elegant green.


The next image was also found in the Smithsonian archives, and is dated in the archives as 2003.  It reflects the renovation of this garden completed by Craig Bergmann (other documentation I've read dates this renovation to have occurred in 1997).  In this version, the pools have remained, but the statue has disappeared.  Pavers have been laid as an additional element between the two pools, and the overall look of the garden has become markedly more "ornamental" with the addition of flowering shrub and ornamental flowers.  Look how the trees have grown--those tall vertical trunks have become their own design element in the garden. The garden "walls" have filled in, in spite of the tall trees, and there are no longer multiple entries to the garden.  The overall effect is definitely more appealing to our modern design sensibilities.  


The final picture, below, is the garden as it appears today.  The statue is back, the pavers are gone, and the overall landscaping look has changed slightly once again, achieving a softer, fuller, more mature look while still remaining true to the original concept of the garden. This garden is truly hidden now, with solid green evergreen walls that give no hint of what lies behind them.  The landscaping at the foot of the statue has evolved to a rich and dramatically impactful design statement, as can be seen in the first photo at the head of this post.  This garden flows naturally, with smooth, curving lines that don't look contrived.  A true respite from the world.


I think it's wonderful that the original design has stood the test of time, and has been preserved for 100 years, while the world outside its walls have gone through some pretty dramatic changes.

I wonder, what is your favorite version of the garden?  


Sunday, July 27, 2014

Garden Conservancy Open Days


One of the joys of any gardener is the opportunity to peek into other people's gardens, which is why garden walks are a summer staple for many.  A few years ago, I stumbled into the Garden Conservancy Open Days, completely unaware that they would rock my garden-walk-world forever.  

The Garden Conservancy is a not-for-profit organization dedicated to helping sustain some of the notable gardens in the US.  They regularly schedule Open Days throughout the US as well, an amazing program that allows people access to incredible private gardens that would otherwise be unavailable to them.
I am always astonished at these gardens, which, with their combination of history and splendid design, capture my imagination.  Today's garden was no exception.  

There were 4 gardens schedule on the walk, but we only made it to two.  The first was pleasant. Lovely.  But the second was a show stopper.  It was originally the home of Mr. & Mrs. John T. Pirie of Lake Forest, IL (Pirie as in Carson, Pirie, Scott).  The home was built by Benjamin Marshall in 1904, and the gardens designed by Rose Standish Nichols.
The property covers 11 acres, so there is plenty of room for puttering around in the garden.  And almost every inch has been properly puttered in--manicured, pampered, and finessed.  We were greeted at the front door by the owner, the aptly named Posy Krehbiel.  A little later, we met the head gardener, with whom I enjoyed a lovely chat (she claimed that her sister was a regular customer at the nursery at which I work, but maybe she was just being nice).  At some point in our ramblings through the gardens, we picked up the tidbit that the garden employs 15 full time gardeners during the summer season.  That's basically 1 per acre, plus a couple of people to do all the containers, and a few spares to cover days off!  Their efforts are evident.  So without further ado, let's dig in and see what all the fuss was about.

At the back edge of the lawn that marched away from the rear of the house stood a tall evergreen hedge, forming an impressive wall.  Following a small footpath around the edge led us into a shady private retreat so well tucked away that it came as a delightful surprise.  It features a pair of matching Chinese statues at either and, at the feet of which are still, dark reflecting pools.  The "walls" of this garden are exquisitely designed, dense layers of a beautiful selection of shade-loving plants.  At the feet of the statues, a lovely collection of Ghost fern, Japanese Painted fern, and 'Jack Frost' Brunnera.  The lateral walls featured Annabelle Hydrangea, variagated Dogwood, and Aruncus, it's frothy white blooms nodding gracefully in the breeze.  I could have spent the whole afternoon just exploring this garden room, but there was so much more to see.

A woodland path set in wide flagstone led us along the edge of a ravine, with occasional garden resting spots featuring beautiful vignettes.  In this one, a dead tree trunk forms an elegant architectural element, and has been set around with a bed full of Prairie Dropseed grass.  The effect was so stunning that a photo cannot begin to capture the actual beauty of the location.


The woodland path meandered around the edges of the path, eventually leading us out to the top northeast corner of the property, where a statue of Diana the Huntress stands cradling several varieties of Clematis in her arms.  It's so lovely that I'm tempted to hunt for a similar collection of Clematis myself. 

 Here is the view Diana the Huntress gets to look at--the perfectly manicured lawn leading, on the left, to the pool and pool house, and, straight ahead, to the house.  An amazing Linden Alle lies just outside the frame of this photo, on the left.  The wide terraced steps are wonderfully flanked by specimens selected for their shape, texture, and color, creating an impeccable view fit for a goddess, even if she is a statue.

Here is a detail from the purple plants flanking the steps.  Many of us are familiar with the lovely foliage of the smokebush.  Most gardeners would cut this plant to the ground at least once every few years, as we are told that is the best way to ensure good color as well as to control the size.  But this is a smoketree--the trunk was a good 6" around, and the tree stood about 18' high.  If you look at the photo of the steps above, you can see this specimen in the upper right of the photo--that will give you and idea of the scale of this planting.


The pool house, located in the back northeast corner of the property, featured formal knot gardens at either end.  This photo is from the south end of the pool house.  The north end was similar, but in an unusual move, the espalier were some very impressive Ginko biloba.  Both of these formal knot gardens were completely surrounded by tall yew hedges, and therefore create an intimate and private setting.

The pool house, framed by a lucky grouping of hollyhocks that suited themselves to photo ops.


As you come back up to the east side of the house, you find yourself in a fabulous cutting garden.  The perennial border was about 5'-6' across, tightly planted.  This is where I met up with the head gardener, who told me that most of it is planted fresh from plugs each year.  She had a particularly gorgeous Mallow called "Primley Blue," for which I will launch a dedicated and devoted search to include in my own garden next summer.


Oh, look, it's the Gardeners House.  And the front door has a cute little trowel as a door knocker.  I wonder if they are hiring?  What a beautiful place to work--I can't imagine ever having a bad day in this setting, although I suppose into every garden a little rain must fall.  But if you have a gardener's house into which you may retreat during the cloudburst, who cares!?!  

This garden was truly a delight.  I took far more pictures than I can decently share in a single blog post, so I may have to revisit this topic another time so that I can share the rest.  In the meantime, it's time to get back to reality and my own little suburban garden.  But this visit was a welcome respite from my mid-summer garden blues.


Monday, July 21, 2014

Fine Gardening Magazine Feature!


Today I'm posting a blog post of a blog post.  A month or so ago, I submitted a photo of my garden to Fine Gardening magazine in response to a "casting call" on their Facebook page, looking for gardens to feature in their blog.  I didn't really expect to hear anything back, but a few days later, I got an email from them requesting more photos and more information about me and my garden.  I scrambled to find some good pictures.  Funny, it turns out that I take WAY more photos of other people's gardens than I do of my own.  I generally snap photos for inspiration, not for documentation.  And, the idea of taking photos in July was not a thrilling prospect--my garden had just been cut back hard and was in "recovery mode" from it's June splendor.  Not looking it's best.  But with a little searching, I did come up with a handful of photos and sent them in, along with some information about me and my gardening philosophy.


 I was tickled pink that Fine Gardening notified me last week that my garden was being featured this week!  One could be tempted to let one's head swell if their garden were featured as Fine Gardening Magazine's Garden of the Day.  But that will never happen, as all I need to do is walk out into my yard and see how much work I still have ahead of me to build the garden I dream of having.  In the meantime, though, a little encouragement never hurts!!

Click on this link to go to the Fine Gardening Magazine blog:  Kirstin's Young "From Scratch" Garden in Illinois

Thursday, July 10, 2014

Garden Clubs and Monarch Eggs

As we approach mid-July here in Northwest Illinois, summer is going full swing, even if the cooler-than-normal temperatures have us all scratching our heads.  I don't mind it at all, though!  Since I work outside all day, every day, the cooler temperatures have made me a happy gardener.  And the regular overnight rains have kept all my plants watered on a very convenient schedule.  My containers have never been perkier in mid-July!

Speaking of which, last night I had the opportunity to go and speak to the Rolling Meadows Garden Club about creating unique and interesting combo planters.  As always, I find the experience of speaking to a garden club so rewarding, because the learning process is nearly always a two-way street.  They learned about design principals behind planting combo pots, and I learned something interesting from them as well.

There are a couple of women (at least--there are probably more, but I only spoke to 2 ) who are very interested in saving the Monarch, and have taken on an endeavor of collecting the Monarch eggs on bits of milkweed leaves, hatching them, and caring for them until they are full-grown butterflies, ready to be released.  To-date this year they report that they have released well over 200 adult butterflies.  That is pretty exciting news!

I  have a nice patch of Asclepias syriaca in front of my garage (and a smaller patch of Aclepias tuberosa in another bed).  The syriaca in years past has yielded caterpillars which I have helped my son raise and release.  But last year, we never saw a single caterpillar, in spite of seeing eggs.  One of the women last night told me that only 1% of the eggs ever hatch, and most are eaten by ants.  Since we live in Antopolis, the center of the ant universe, I instantly recognized our problem.  If I ever wanted to see a caterpillar, chances are I'd have to bring the eggs in and try my hand at hatching them myself.  She explained the process:  Cut the section of leaf with the egg on it, and place it on a moist paper towel in a container, egg-side up.  Check regularly over the next 7-10 days.  The eggs will start to darken shortly before hatching.  Place a fresh milkweek leaf in the container daily as soon as the eggs begin to darken, to ensure that the newly hatched caterpillars can find food right away.


I woke up earlier than usual this morning, and thought I'd go ahead and take advantage of my extra half-hour to check out my milkweed plants.  I hit paydirt almost immediately.  I'm not SURE they are all butterfly eggs, but we're going to give it a try and see what happens!

In other news, I've begun getting calls from garden clubs across Northwest Illinois to book me for the coming club seasons.  I've heard from 3 clubs in the past week or so--Antioch, Inverness, and Des Plaines.  Each of them booked a different program.  Looking forward to filling up my cold-weather months with these programs.  Because what's the only thing better than gardening itself?  Why, talking about gardening, of course!

Sunday, April 27, 2014

Native Gardening is Hot, Hot, Hot!

What's the latest hot trend in gardening?  These days, it's all about getting back to our roots and selecting native plants.  The Perennial Plant Association selected a native grass as their 2014 perennial of the year:  Panicum virginatum 'Northwind', also known as Northwind Switch Grass.

Why go native?  There are so many great reasons! To begin with, it just makes sense that plants that are adapted to the climate and soil will thrive in our gardens. Instead of pouring money  into plants that aren't meant to survive here, spending loads of time coddling these fussy strangers along and trying to convince them that they like it here, we can look to the beautiful and often overlooked plants that have set their roots here for many generations-they are more cost and time efficient.  

All Asclepias species are hosts to Monarch Caterpillars
Perhaps you are a great gardener, with a green thumb and a micro-climate, who is able to successfully grow plants not native to our region.  There are still very important reasons you should consider incorporating at least some natives in your garden beds.  Many species rely on these plants in order to eat and survive!!  Perhaps you've heard the plight of the Monarch butterfly, and the plea to plant milkweed.  Milkweed is the only plant that the caterpillars of the Monarch can eat.  They cannot survive on any other plant.  And the Monarch is the rule rather than the exception.  Many of the other butterflies rely on specific plants as a food source, and if that food source disappears, so will the butterflies.  They cannot adapt.  They cannot change their digestive system to suit the plants that WE think they should.  And, as our land is continually developed, their ecosystems, with the natural plants they rely on, are quickly being replaced with sod and non-native species.  Even incorporating a small, diverse selection of native plants into your landscape can provide an oasis for these species which they desperately need!

There is a lot of press out there right now about butterflies and bees.  Attracting pollinators to your yard is a must-do these days.  Many catalogs and greenhouses offer lists of  plants to attract bees and butterflies to your yard.  And it is a wonderful endeavor, to create a habitat for these creatures.  But before you set off to plant up your butterfly plot, double check that the majority of those plants are native to your area.  Planting lovely flowers will certainly attract bees and butterflies.  But if you wish to keep them in your yard, if you wish to truly create a habitat that will invite them to come and stay, those native plants are your key to success!!


More Reading:  Illinois Extension Article on Butterfly Gardens

Monday, April 21, 2014

Composting: Optimize Your Soil

Yesterday was that perfect day of spring that all gardeners spend their winters dreaming about.  After a particularly long and bitterly cold winter, followed by a snow-filled spring, the sunny, yesterday's 70F weather beckoned me outdoors to work in my garden.  I had already cleaned up most of my beds.  There was some light weeding to do (I don't know about you, but there is ALWAYS weeding to do in my garden!). But my main goal yesterday was to side-dress my perennials with compost.

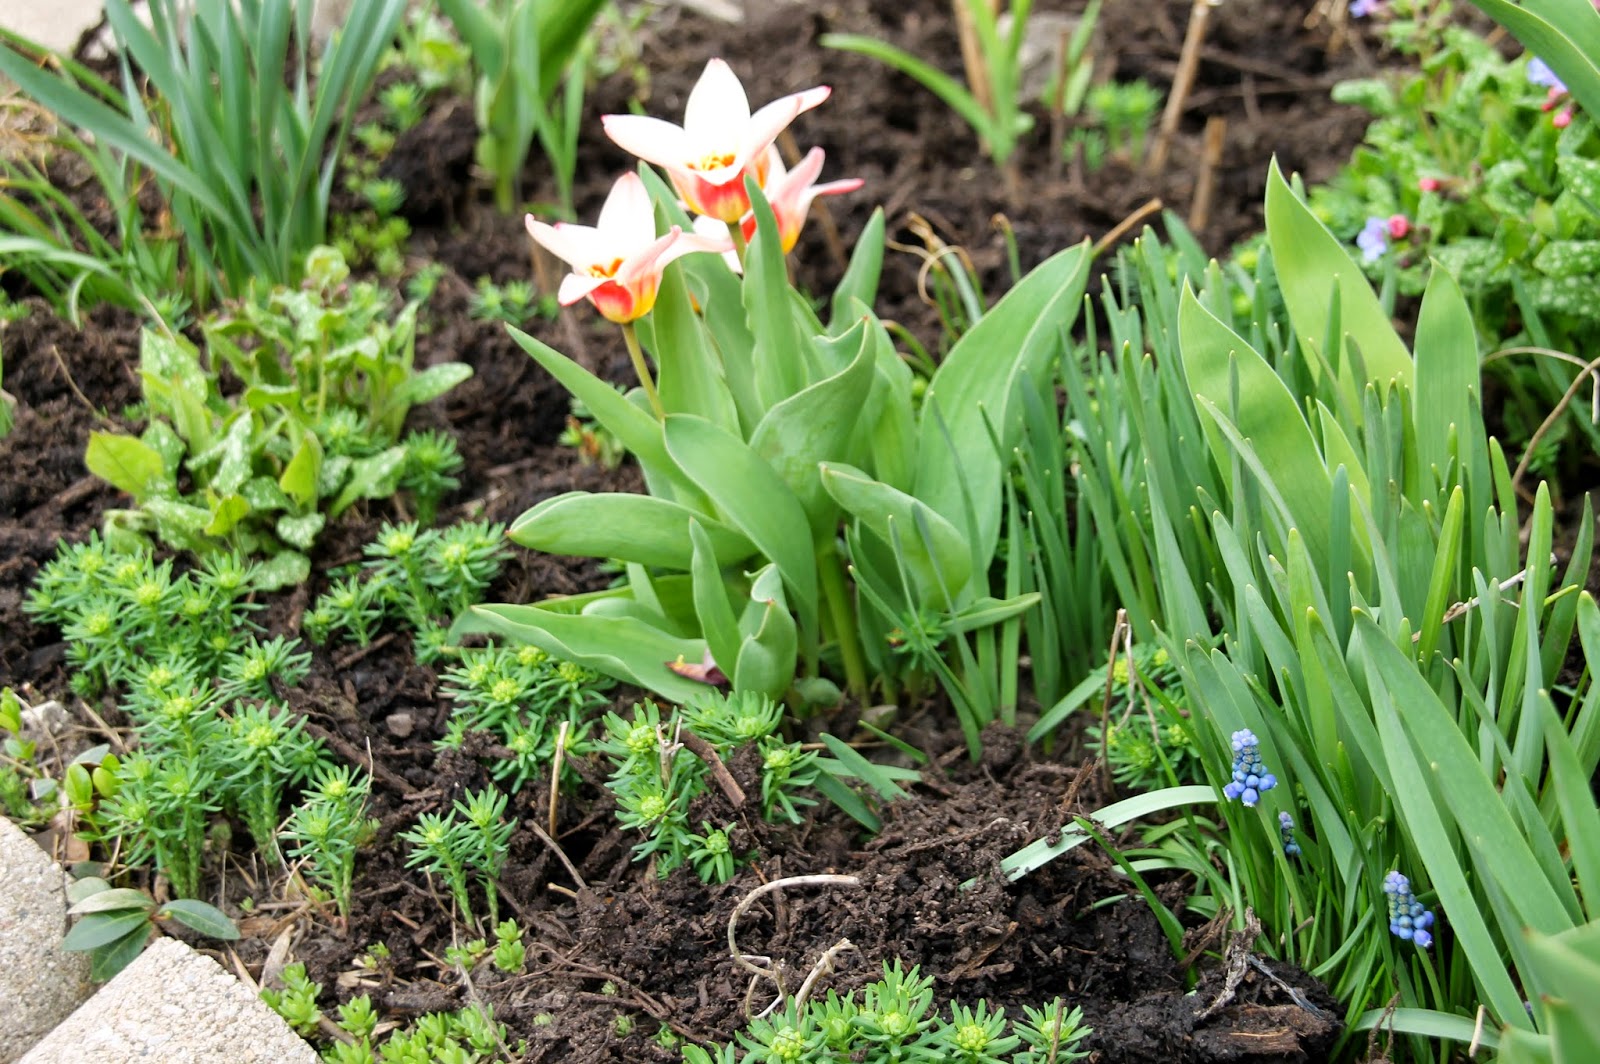
The foundation bed along my front walk, top dressed
Adding compost to your garden beds is the #1 best thing you, as a gardener, can do to improve your soil.  Compost, by the definition found in Merriam Webster Dictionary, is "a mixture that consists largely of decayed organic matter and is used for fertilizing and conditioning land."  It is a simple and straightforward definition, but I find that gardeners have a lot of questions and concerns about which compost is best, how and when to apply it, and how to make their own compost.  Before we get to that, though, let's look a little deeper at how and why compost is so beneficial to your soil.

Soil is something that, in and of itself, we often take for granted.  We may vaguely know we should add various amendments to it, but we seldom think about how soil functions, and how or why something like compost is beneficial to it. Soil may be defined as the upper layer of the earth's mantle which may be dug or plowed and in which plants grow.  In other words, soil consists of tiny particles of worn and eroded rock upon which it lies.  While soil contains minerals, it does not inherently contain any of the organic matter that creates a rich growing medium. But, when decaying organic matter is placed in or on top of the soil, the creatures that live within the soil quickly go to work to break it down and incorporate it.  This material becomes humus, and it's properties allow the soil to bind together in healthy ways, to hold water, and to unlock and make available to plant roots vital minerals needed for healthy photosynthesis.

Compost is the term we use for decaying organic material.  Compost may be made up of kitchen scraps and old leaves, or it may be a manure pile behind the horse stable.  Anything that was once alive and now is decaying can be qualified as compost.  As for me, I have a couple of ways that I get and use compost.  For my flower beds and my shrubs, I go to our Village Public Works yard with a bunch of empty buckets.  There, they offer free aged compost that incorporates manure from the town horse stable, and clippings collected from Public Works projects, like hedge trimmings and dead plant materials from last year's planters, old beds, grass clippings, etc.  I can shovel and take away as much as I like, and with a couple of car loads, I can dress all my beds with this excellent free compost.

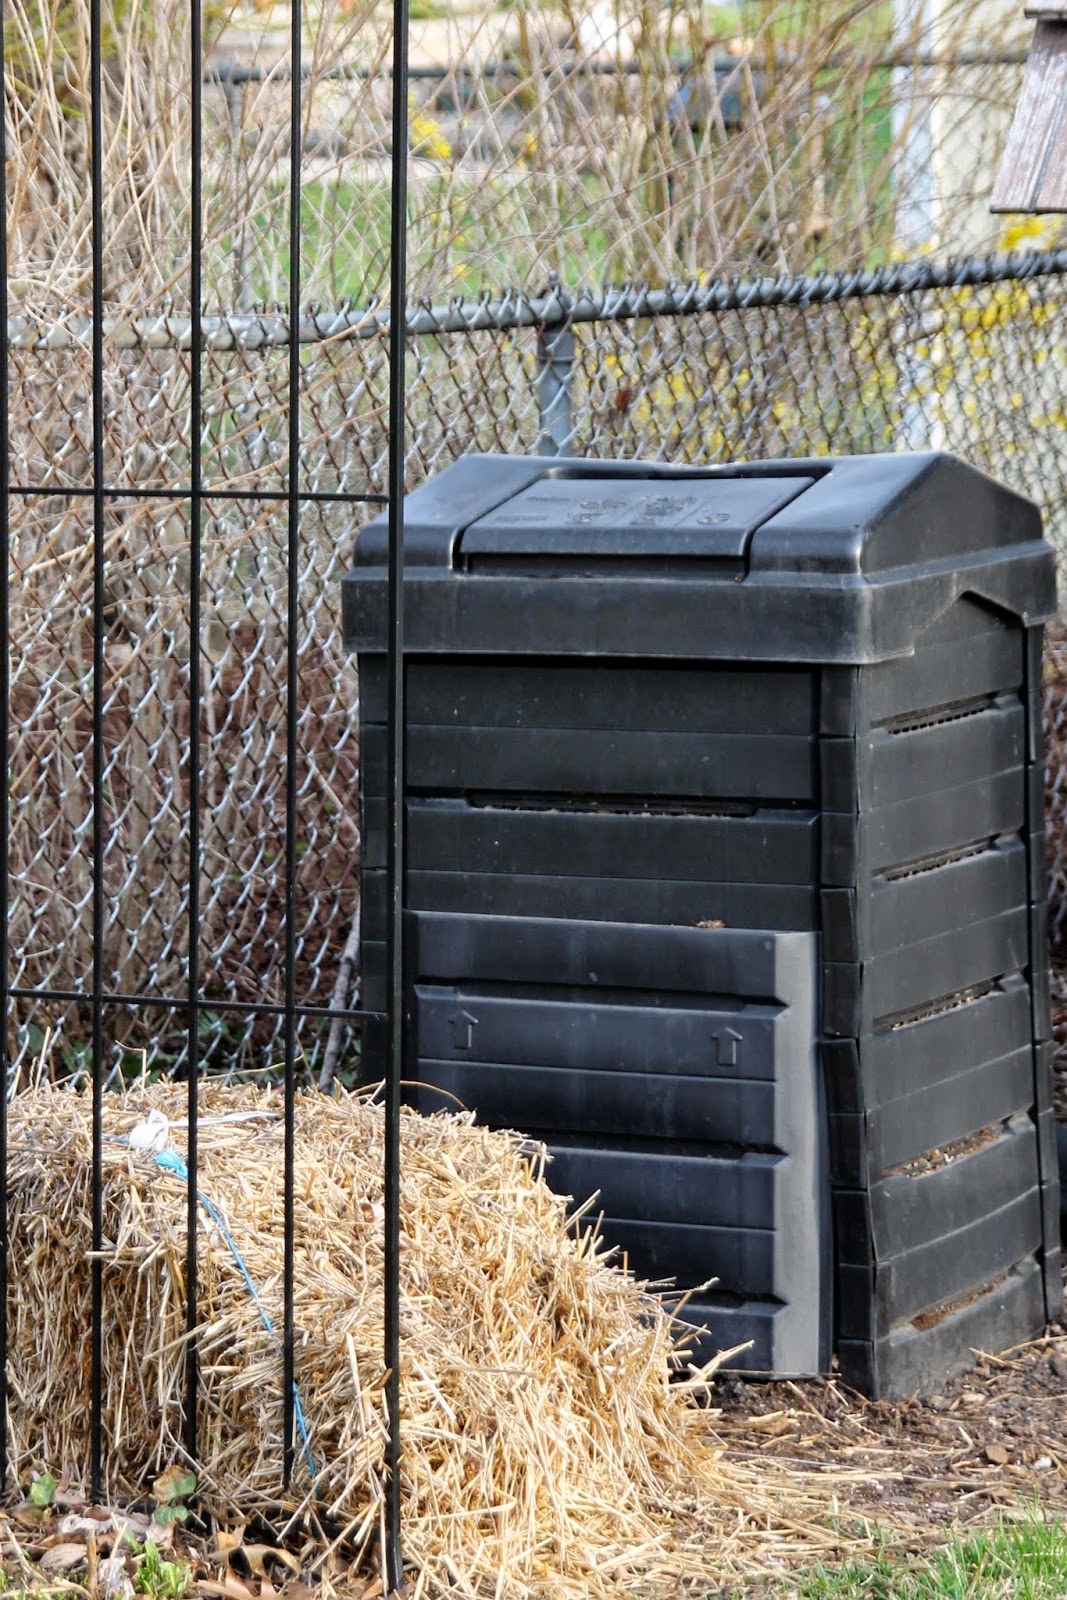
However, in my vegetable garden, I like to be a little more particular.  I like to grow my vegetables organically, and to ensure I am doing that, I make my own compost in one of the small, plastic home composters that are available to purchase at your local garden center or in catalogs.  This has benefits and drawbacks, which I'll get to in a bit.  But for right now, I want to highlight the main benefit--unlike any other compost, this method allows me to have complete control over what goes in to this compost, and ultimately, into the plot on which I grow our vegetables.  For example, when I add grass clipping from my own yard, I do it with confidence, because we do not treat our lawn with chemicals.  I cannot know for certain what is in compost I obtain from any other source.

Of course, compost is commercially available in bags at your local garden center.  You can buy anything from simple bagged manure to extra-pricey organic compost or mushroom compost.  There is nothing wrong with buying it, and any and all of it is beneficial to your soil.  Unless you are concerned, like me, about it being organic, you don't have to choose the pricey mushroom compost over the cheaper bagged manure.  In fact, it is important to be aware that mushroom compost can be high in salts, and those salts can build up in the soil over time.  This just illustrates that the most expensive option isn't always the best option.  Since compost near me is so easily obtained for free, I feel like I'm wasting my money if I buy it bagged.  It's a little more work, but I have the time and energy to do it.  The convenience and time-saving benefits of commercially-prepared bagged compost are a great option for many gardeners.

My compost bin, with a bale of straw in front

 If you are interested in composting yourself, you can make it as complex or simple an operation as you like.  You can bury your kitchen scraps in the garden-that's as simple as it gets.  Or you can build yourself the ultimate 3-stage compost bin, 9' long by 3' wide.  Or you can fall somewhere in between those two ends of the compost scale.  There are 2 main methods of composting, hot composting or cold composting. I should also mention worm composting, also called vermicomposting, which I have tried, but find somewhat impractical to maintain on a large enough scale to make it beneficial for me.


Cold composting is what I do in my bin.  You simply add your organic materials and let them do their decaying on their own time.  I generally add alternate layers of "green" kitchen scraps or any other fresh organic material, with a layer of "brown" straw, dead chopped leaves, or sawdust.  Every so often I turn my pile to make sure it has air circulation, and check it to make sure it's moist so that the materials decay rather than dehydrate.  It may take a little longer to produce compost, but that's ok with me.  It's an easy, no-fuss method of composting, and suits my style of gardening.  Since I only use my homemade compost on one area of my yard, my vegetable garden, I'm not worried about volume or how fast it is produced.

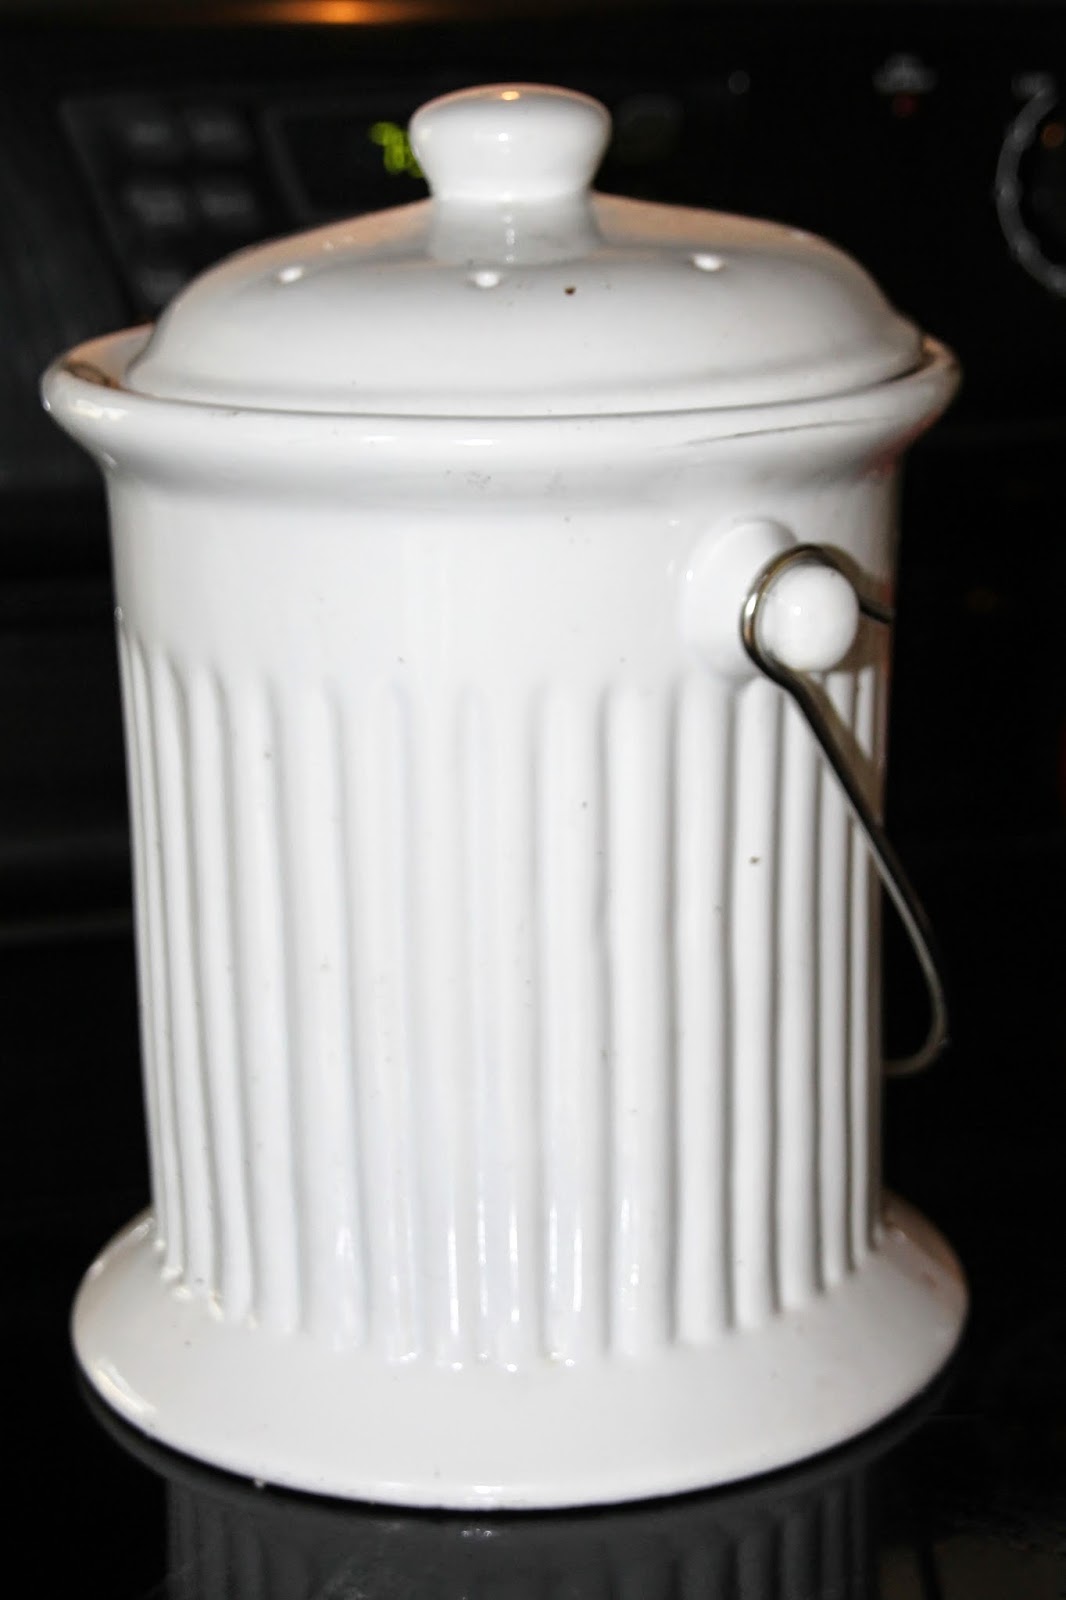
I collect my kitchen scraps in this ceramic pail.
Hot composting is a little more involved process, in which the composting occurs more rapidly and thereby  generates heat.  It can generate high-quality, weed-free compost in a relatively short period of time, but it does require a little more attention.  It uses the same materials as cold composting, and the same ratios, but just in a larger, more managed pile.  A hot compost pile generally needs to be a minimum of a cubic yard in size in order to have enough mass to maintain the heat required to cook the compost.  Most commercially available plastic composters, like the one I have, are really too small to make an effective hot compost pile, although I have no doubt that there are times where the process accelerates enough to generate hot compost conditions for short periods of time. However, they just are too small to maintain the mass needed to sustain that reaction for long.  The benefit of hot composting over cold composting is that hot composting will kill any weed seeds incorporated into the pile.  Cold composting will not do that.  Something to be aware of when adding material to your pile. When I have a weed that has gone to seed in my yard, I try to keep it out of the compost pile.  I use straw as my brown material, rather than hay, which contains thousands of seeds.
If you are incorporating cow, horse, or chicken manure into your compost pile, you should probably aim to have a hot compost pile to kill any potentially trouble-causing ingredients--whether that is weed seeds or salmonella.

Veronica 'Waterperry Blue,' side dressed with compost
As a gardener, you can add compost to your garden in two ways.  You should definitely incorporate it into the soil each and every time you dig a hole in your garden.  But, for established beds, you may simply side-dress your plants with compost.  The earthworms and other organisms within the soil will come to the surface and bring it down in to the soil naturally over time.  In fact, a good example of this is to consider a bed that you mulched last spring. If that mulch was laid directly on the soil, then the depth of it today is considerable less than it was when you first laid it.  That is because, as it decomposed, our friendly little soil-dwellers have been busy incorporating it into the soil.  Cold composting at it's finest.

Compost is a vital part of maintaining healthy, vibrant soil and keeping our plants happy and productive. It need not be intimidating, nor expensive.  If there is one thing you would add to your gardening chore list, I would encourage you to consider adding compost.  You can't go wrong!